

Easy Gingerbread Nail Art Tutorial (Step-by-Step for Beginners)
Are you ready to get into the holiday spirit with a festive manicure? Can a simple gingerbread nail art design elevate your Christmas celebrations?
Welcome to our easy-to-follow guide. We’ll show you how to create your own adorable gingerbread-inspired nail art. This tutorial is perfect for beginners and will help you achieve a sweet and seasonal look.
Before we start, make sure your nails are prepped and ready. You’ll need a base coat and a steady hand. Let’s dive into the world of holiday nail art and make this occasion one to remember!
Getting Ready for Your Festive Nail Design
Getting your nails ready for a festive design is the first step. It’s all about having fun and looking stylish. Start with clean and shaped nails for a professional look.
Essential Tools for Gingerbread Nail Design
Before you start, make sure you have the right tools. This will make your nail art process smooth and successful. You’ll need:
- A nail polish base coat to protect your nails
- Red and green nail polish for the gingerbread theme
- A nail art brush for detailed designs
- Nail glue for any nail art decorations
- A top coat to seal your design
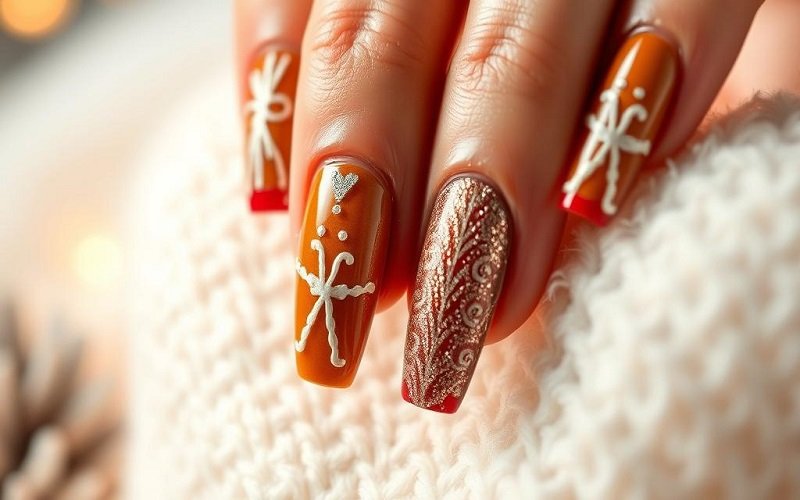
Some ideas for festive nail designs to inspire you include candy cane stripes, holly leaf patterns, and snowflake designs. You can also try different colors and combinations for a unique look.
With the right tools and a bit of creativity, you’re on your way to a festive nail design. Take your time and have fun trying new things. It’s all part of the excitement!
Creating the Perfect Gingerbread Nail Base
Making the perfect gingerbread nail base is key for a festive holiday nail art look. The base of your nail art sets the tone for the whole design. So, it’s very important to get it right.
Applying the Base Coat
Before adding any color, prep your nails with a base coat. This protects your nails and gives a smooth surface for your gingerbread nail art. Pick a base coat that fits your nail type, whether it’s nourishing or quick-drying.
The base color can greatly change your gingerbread nail design. For a traditional gingerbread man look, use a warm, beige, or light brown base. These earthy tones make your nail art look more authentic and festive.
When picking a base color, think about the look you want. For a modern twist on classic gingerbread nail art, try a bold or metallic base. The most important thing is to have fun and try different shades until you find the perfect one.
After applying your base coat and choosing your base color, you’re ready for the fun part. Designing your gingerbread nail art. With a perfect base, your nail art will look more professional and last longer.
Step-by-Step Gingerbread Man Design Tutorial
Turn your nails into cute gingerbread men with our easy nail tutorial. It’s great for beginners. Follow this guide to get a fun holiday look.
Adding Details to Your Gingerbread Nail Art
You’ll need brown, white, and red polish for this. Start with a base coat to protect your nails and help polish stick.
Paint your nail brown for the gingerbread. Use a brush or dotting tool for details. For more detail, try a nail stamp or stickers.
Now, add icing and candy buttons. Use white for icing and small dots for candy. Add a smile and eyes with black polish.
- Paint your nail with a base coat.
- Apply brown polish for the gingerbread man.
- Use a nail art brush or dotting tool to add details.
- Paint on white icing and add candy buttons.
- Finish with a top coat to seal your design.
| Design Element | Description | Polish Color |
| Gingerbread Man | Main body of the gingerbread man | Brown |
| Icing | Simple design on top of the gingerbread man | White |
| Candy Buttons | Small dots on the gingerbread man | Red, Green, or other colors |
Follow these steps and practice to make a cute gingerbread man design. Try different colors and designs to make it your own.
Creative Gingerbread Nail Variations for Beginners
Gingerbread nail art is for everyone, not just experts. Beginners can make amazing designs with these easy variations. You can go for a classic gingerbread man or try something new.
Make your Christmas nails pop with gingerbread-inspired designs. Try gumdrop accents or candy cane stripes. Don’t be afraid to play with colors and patterns to make your nails unique.
For detailed designs, use nail guides or stickers. They help you get sharp lines and details. Here are some fun gingerbread nail art ideas:
| Design | Description | Skill Level |
| Gingerbread Man | Classic design featuring a gingerbread man on a brown background | Beginner |
| Gumball Accents | Add colorful gumball accents to your gingerbread nail art | Intermediate |
| Candy Cane Stripes | Create a festive look with candy cane stripes | Beginner |
With these creative gingerbread nail variations, you’ll wow your friends and family. Your holiday nail art will be a hit.
Conclusion:
Now that you’ve made your gingerbread nail art, it’s time to keep it looking great. Apply a top coat to seal your design and prevent chipping. This will keep your festive nail art looking vibrant all holiday season.
Share your gingerbread nail creations on social media using relevant hashtags. You’ll get lots of admiration from friends and family. Showing off your nail art can also inspire others to try this fun and creative design.
With these simple steps, you can enjoy your beautiful gingerbread nail art all season long. Happy holidays, and happy nail art creating!